For some reason, most Kenmore refrigerators eventually run into a similar problem – the ice maker stops working. There are countless cases of Kenmore refrigerator owners who say they’ve had this problem.
Here’s the good news – after working on used appliances for over a decade now, I can tell you that around 80% of all Kenmore refrigerator ice makers that are not working are relatively easy to fix.
If you try each and every one of these solutions, I am extremely confident one of them will work for you.
NOTE: You’ll find Kenmore ice makers in three main locations: the refrigerator door, inside the top of the freezer for side-by-side models, and finally in the bottom freezer drawer. I’ll provide instructions for all three.
Kenmore Ice Maker Not Working
If your Kenmore ice maker is not working, you need to reset it. Start by turning the ice maker OFF, then ON again. Next, press and hold the test button for 3 seconds. The ice tray will attempt a full dump cycle and your Kenmore ice maker should be working again!
Keep in mind that you won’t be able to perform a reset of the ice maker with the ice bucket fully installed. So you’ll want to take the ice bucket out and then put a bath towel underneath the ice tray to catch any ice/water that spills out.
But before we go any further, let’s make sure your ice maker is ON to begin with!
Confirm ice maker is ON and check temp
Yes, I know, this sounds obvious. But you’d be surprised by how many Kenmore ice makers I got working again simply by turning them ON!
Start by looking around for your ice maker’s ON/OFF button.
NOTE: Depending on which model Kenmore refrigerator you own, your ice maker may, or may not have an “ON/OFF” switch, and that’s OK!
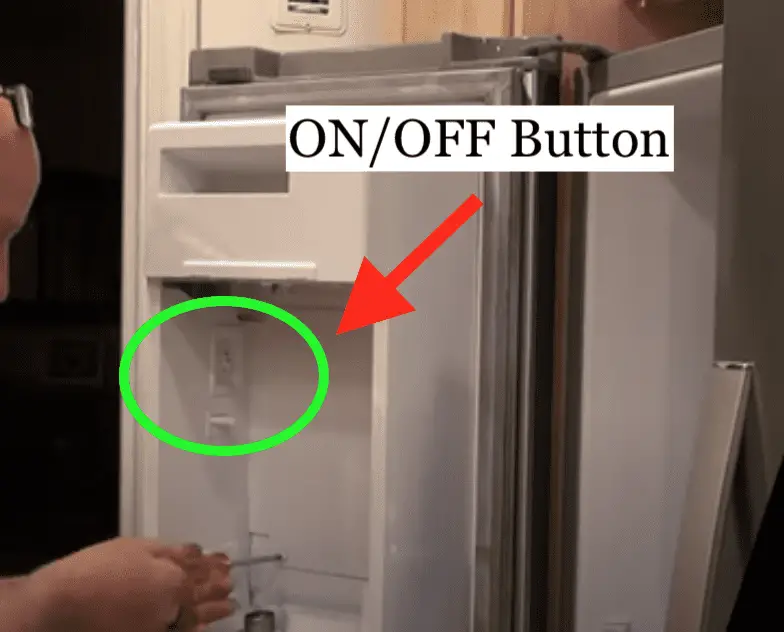
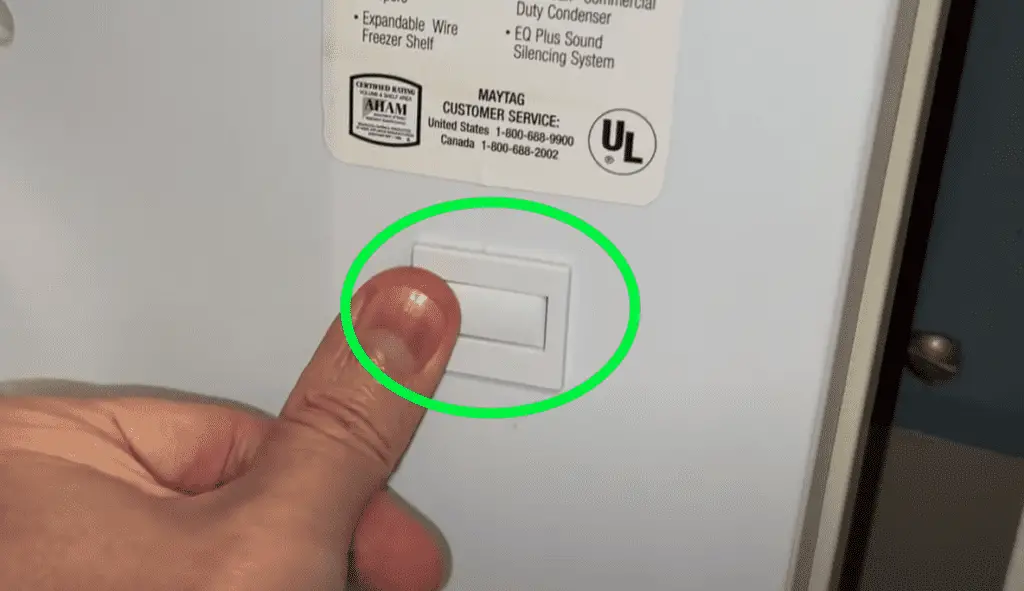
On newer models of Kenmore refrigerators that have the ice maker in the door, you should see the ice maker ON/OFF button towards the upper left-hand corner.

For some models you’ll have to remove the ice bucket first in order to expose the ON/OFF button.
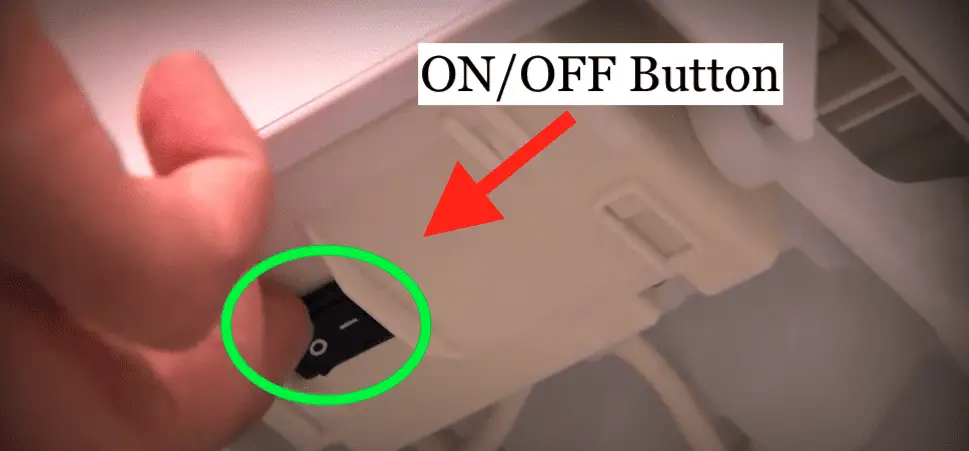
For side-by-side models, where the ice maker is in the top of the freezer, you’ll see the ON/OFF button for the ice maker underneath.
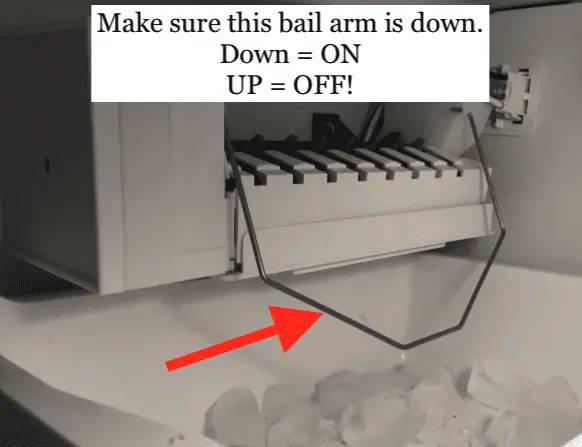
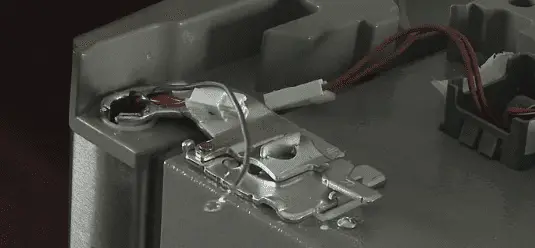
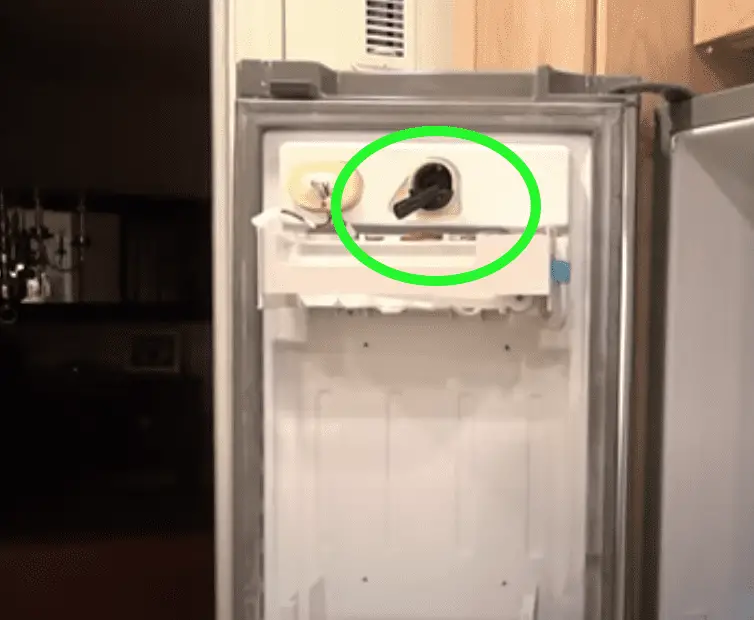
Other, older Kenmore refrigerators have a bail arm that acts as the ON/OFF mechanism for your ice maker. When the bail arm is down, it’s on. When it’s up, it’s off! It may look something like this:
Regardless of which Kenmore model refrigerator you own, just make sure you look for an ice maker ON/OFF button, and ensure it is ON.
If you can’t find a physical ON/OFF button on the ice maker itself, you may have an ON/OFF button on the display on the front of your refrigerator door!
Confirm that your display shows ICE turned ON.
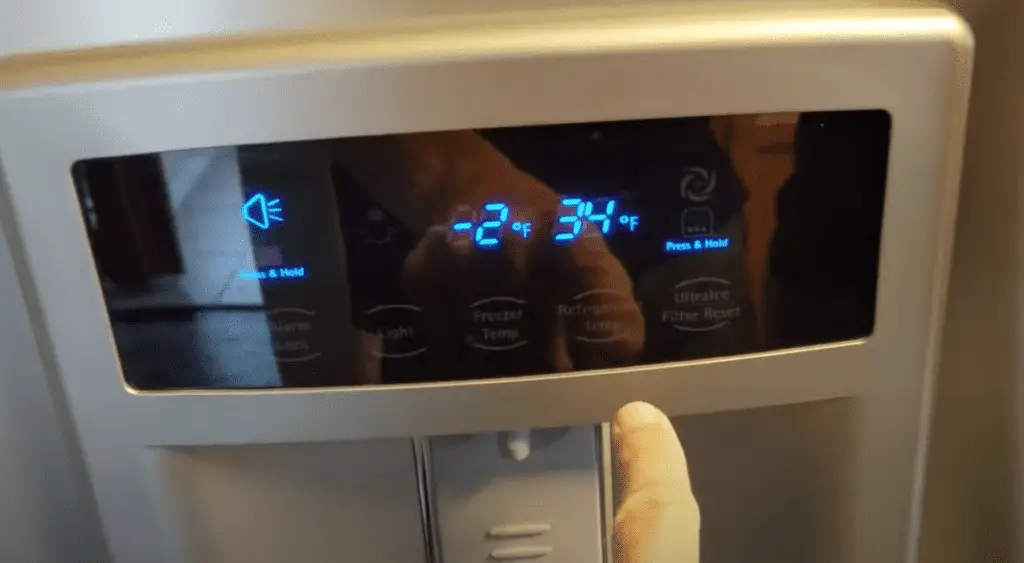
There are several different types of temperature controls depending on the Kenmore model refrigerator you own. All of them are fairly straightforward to adjust.
If you can’t change the display, it might be locked. Simply hold the lock icon for 3 seconds or so and that should unlock your display.
While you’re at the refrigerator display, take a moment to ensure the refrigerator is at, or under 37°F and your freezer temp is at, or under -0°F.
This will allow your ice machine to perform better, especially during summer months when the ground water can reach temps of 70-75 degrees Fahrenheit!
After you make this adjustment, allow your refrigerator 24 hours to adjust.
Ok, now that we’ve made sure your ice maker is actually ON, and your refrigerator/freezer are set to the right temperature, let’s power-cycle it.
Power-cycle ice maker
Power-cycling, and subsequently resetting your Kenmore ice maker is the easiest and most common way to get it working again.
Let’s start by power-cycling it (turning it off, then back on). To start, fully remove the ice bucket.
You already located the ON/OFF button in the previous step. Now simply turn the ice maker OFF, wait 10 seconds, then turn it back ON. You should see/hear the ice maker motor attempt to work.
If your Kenmore refrigerator doesn’t have an ice maker ON/OFF switch, simply unplug your refrigerator from the wall and wait a full 2 minutes before plugging it back. This will reset your entire refrigerator, including the ice maker.
Check refrigerator door wiring
Before you move on, just make sure you check the wiring all the way at the bottom of your refrigerator door. Keep the door open and visually inspect it closely.
Unfortunately this is a design flaw of some Kenmore refrigerator models. The wires were put in without enough slack for the door to fully open and close!
Every time you use your refrigerator door, these wires are pulled on and can eventually rip/tear.
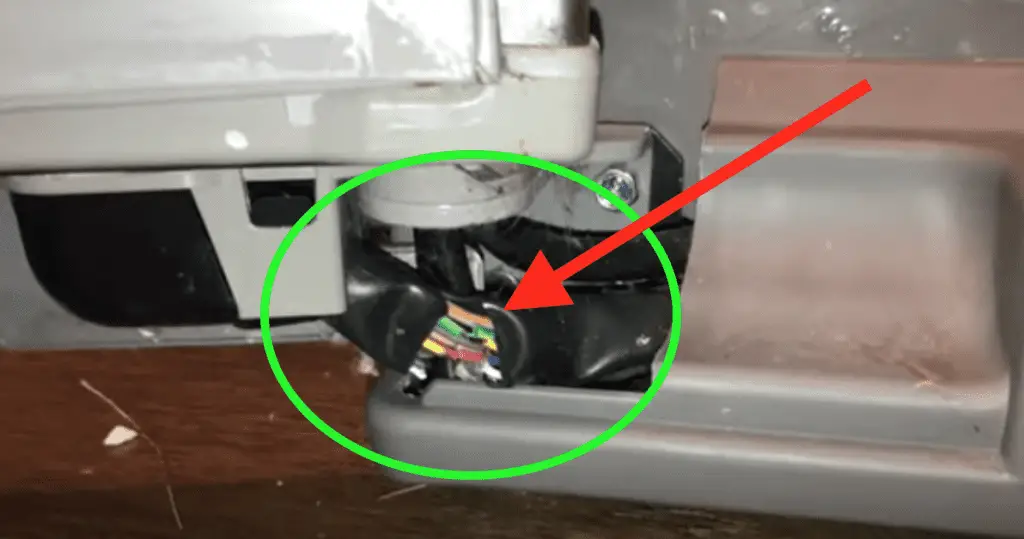
When these wires rip, you’ll lose power to your ice maker. You may need to replace them.
Ok, now that you’ve successfully power-cycled your ice maker and checked to ensure the door wiring is intact, it’s time to reset your ice maker.
Reset ice maker
To reset your Kenmore ice maker, reconfirm the ice maker is turned ON and the ice bucket is fully removed. You cannot test the ice maker with the ice bucket still installed!
Next, place a bath towel under the ice tray to catch any ice/water that may fall out.
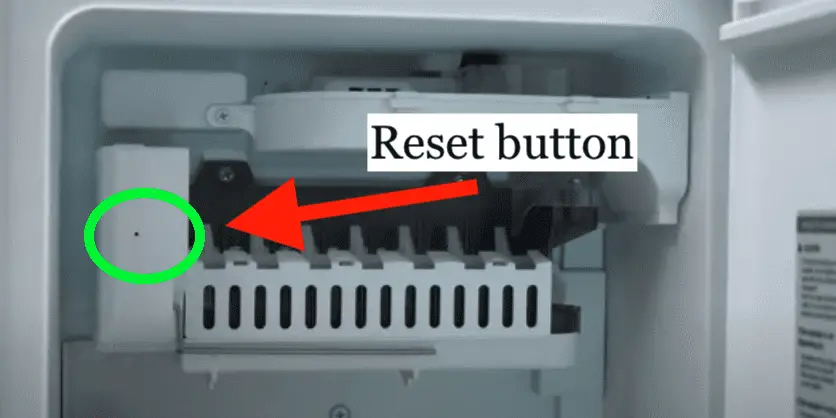
Finally, press and hold the reset button for 3 seconds or so until you see/hear the ice maker begin to turn.
On newer models of Kenmore refrigerators that have the ice maker in the door, you should see the reset button towards the upper left-hand corner, underneath the ice maker.

On some other models of Kenmore refrigerators that have the ice maker in the freezer, you should see the reset button directly underneath the ice maker.

Keep in mind, not all reset buttons are actually “buttons”. Some Kenmore refrigerators have a pin hole reset button on the ice maker itself. For these models you’ll need to use a paper clip to press in the button for 3 seconds.
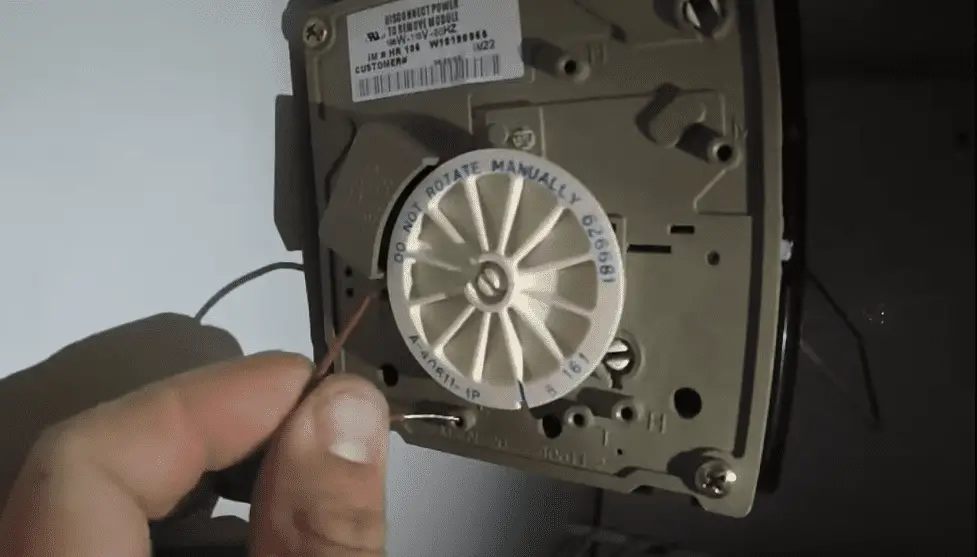
And finally, for older side-by-side models you’ll have to do a bit more work to reset/test your ice maker.
To start, take off the cover of your ice maker module. You should be able to do this by hand without needing any tools!
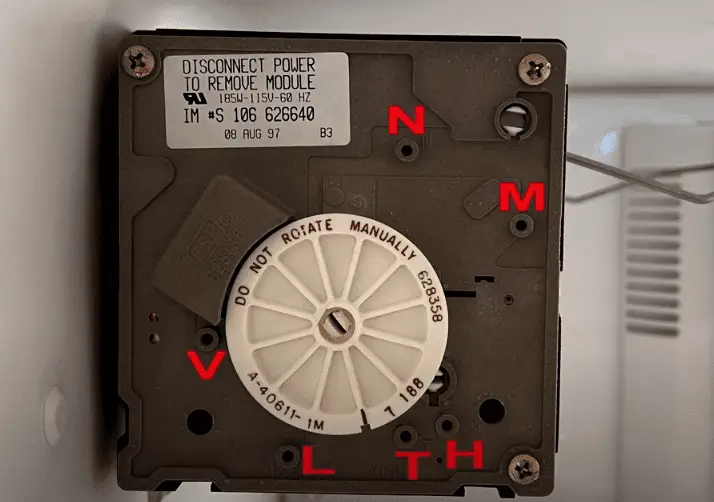
This will expose several holes on the front of the ice maker. We are interested in the holes marked “T” and “H” at the bottom.
Grab an insulated piece of jumper wire (a paper clip with tape as a handle will work too!) and place one end in the T hole, and the other in the H hole.

Leave the jumper wire in until you see the ice maker module begin to slowly turn in a clockwise direction, about 1/4 of a full turn. After a quarter turn, remove the jumper wires.
If your ice maker turns, that’s a very good sign! It if doesn’t, you may need to replace your ice maker.
NOTE: For some models, after you put the jumper wires in the T and H holes, you’ll have to press and hold down the door switch in order for the test to run! This is the switch that shuts off the refrigerator lights and signals that the door is “closed”.
Clear out compacted ice from ice bucket
If, after power-cycling and resetting your Kenmore ice maker, it still doesn’t work, it’s time to clear out your ice bucket.
Sometimes, the ice inside the ice bucket becomes compacted – it turns into a solid chunk of ice. This can happen if you’re opening and closing the door often, or if the ice hasn’t been used in awhile.
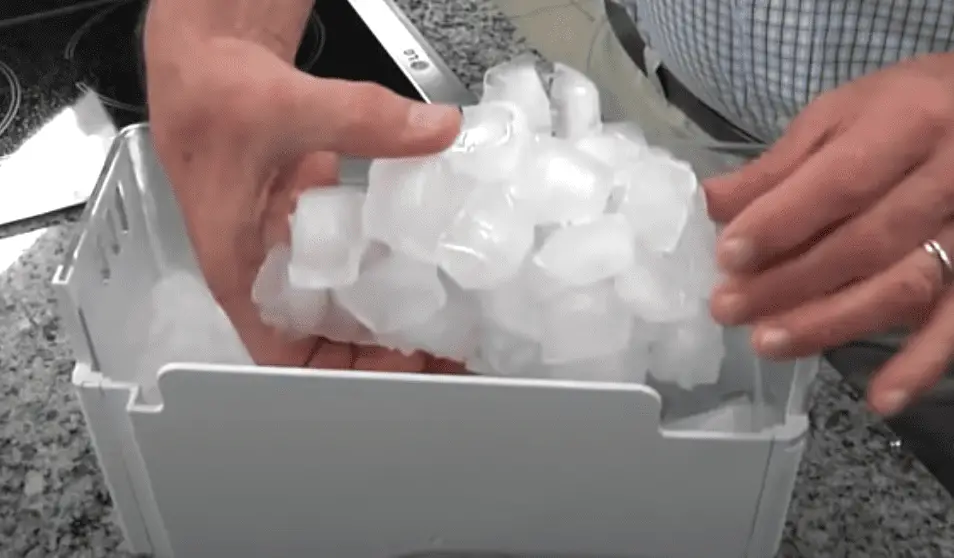
A chunk of ice can easily obstruct the ice dispenser/shoot, blocking any ice from being ejected.
The easiest thing to do here is take out and empty the ice bucket. Alternatively you could fish around the ice bucket and remove any chunks of ice you find.
Hopefully that frees up the ice maker and it starts working again.
Unblock the ice maker bail arm
Now that you’ve removed any compacted ice from the ice bucket, let’s make sure the bail arm isn’t jammed/blocked.

The bail arm occasionally rotates over the ice bucket. If it gets blocked as it is rotating, while hitting ice in the bucket for example, it knows the bucket is full and sends a signal to stop producing any more ice!
Sometimes, stray pieces of ice can fall and block this arm from rotating. If this arm can’t rotate, it thinks the ice bucket is full.
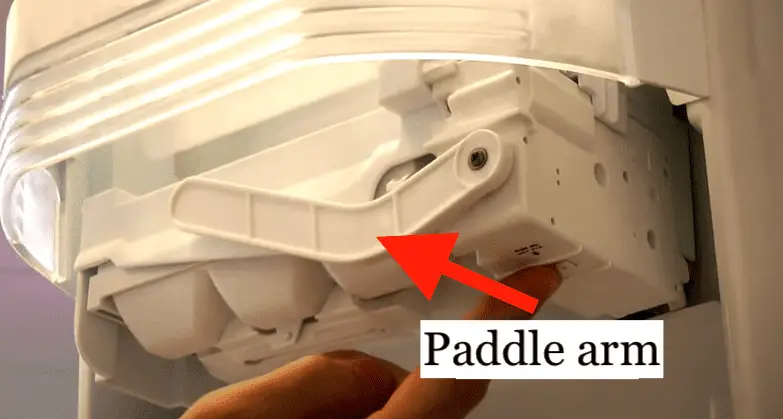
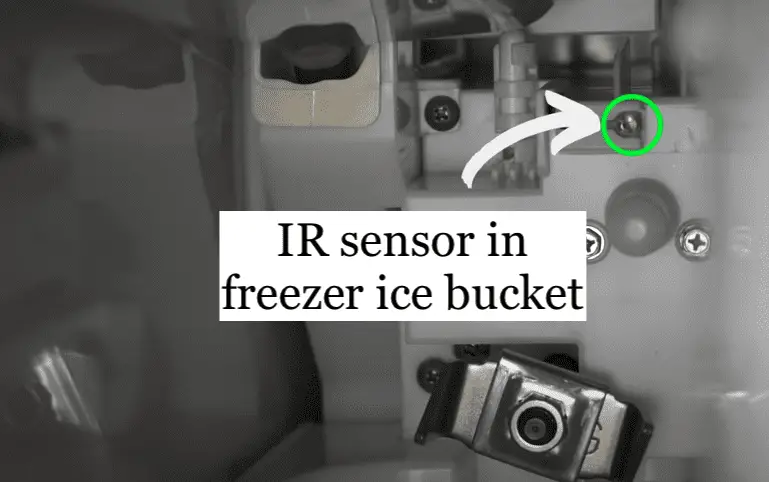
Note that depending on your refrigerator model, this component may be a “paddle arm” or IR sensor. While the name and look of all of these differ, their function and purpose are all the same.
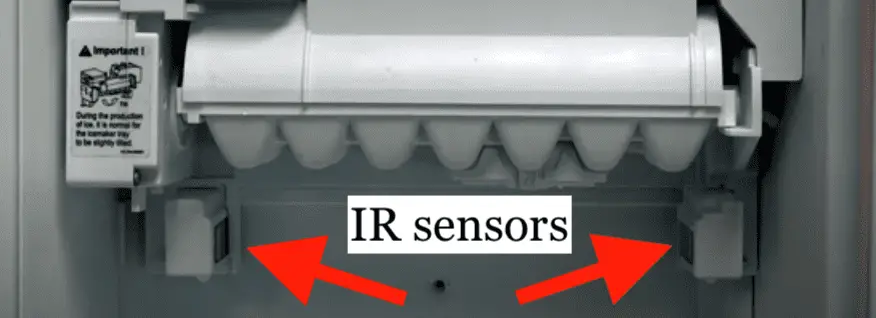
You want to make sure nothing is blocking these from doing their jobs of checking how much ice is in the bucket!
And for ice makers with the bail arm and paddle arms, ensure the arms are down/in the resting position! If the arm is lifted, your ice maker won’t make ice.
Also keep in mind that each of these components may look a bit different depending on where the ice maker is located in your refrigerator! For example, the IR sensors in a freezer ice maker look a bit different than the sensors on a door ice maker.
Make sure water is on
Next, you’ll want to go ahead and double check that your water is turned on. You need water to make ice after-all!
If your Kenmore refrigerator has a water dispenser, the easiest way to check if the water is ON and working is to simply fill up a glass with water.
If the dispenser doesn’t dispense any water, you have a problem!
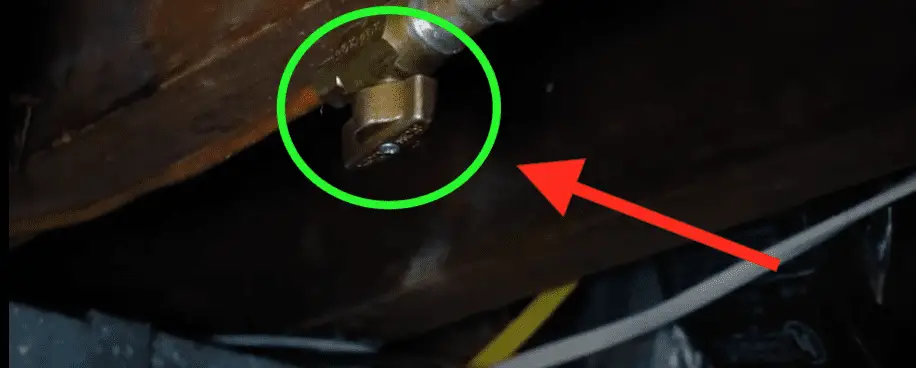
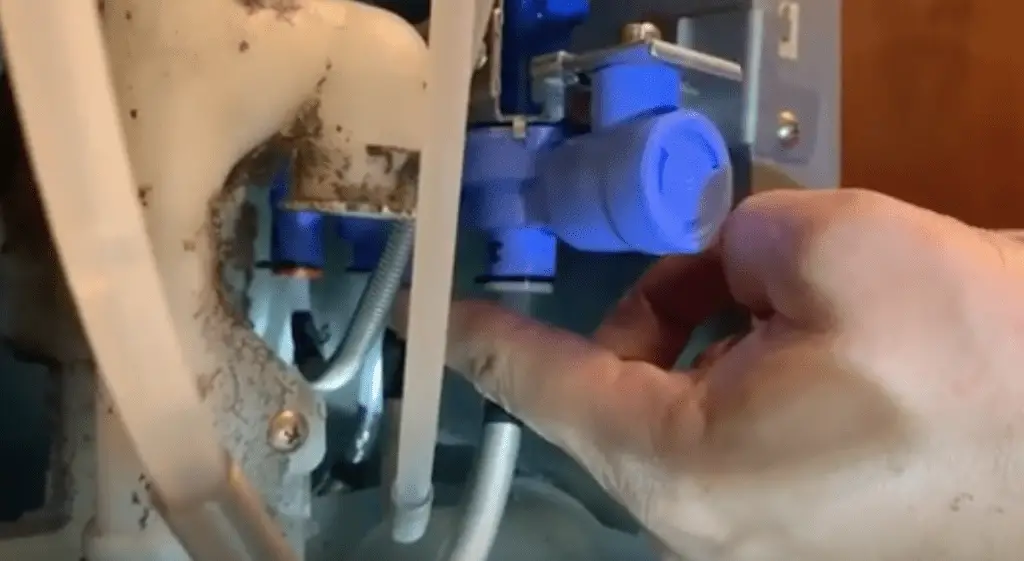
There are few possible reasons why your refrigerator isn’t dispensing water. The first is a closed home water supply valve. Make sure this valve is connected, and in the OPEN position.
Once you’ve confirmed this valve is open, double check that there are no kinks in the refrigerator water lines.
Next, if you have an older Kenmore refrigerator, you should perform a quick water valve test. This process is similar to the ice maker test above, except this time our insulated piece of jumper wire is going to be placed one end in the V hole, and the other in the L hole.
Leave the wires in and you should begin to hear/see water filing your ice maker. If it is, your water valve is working!
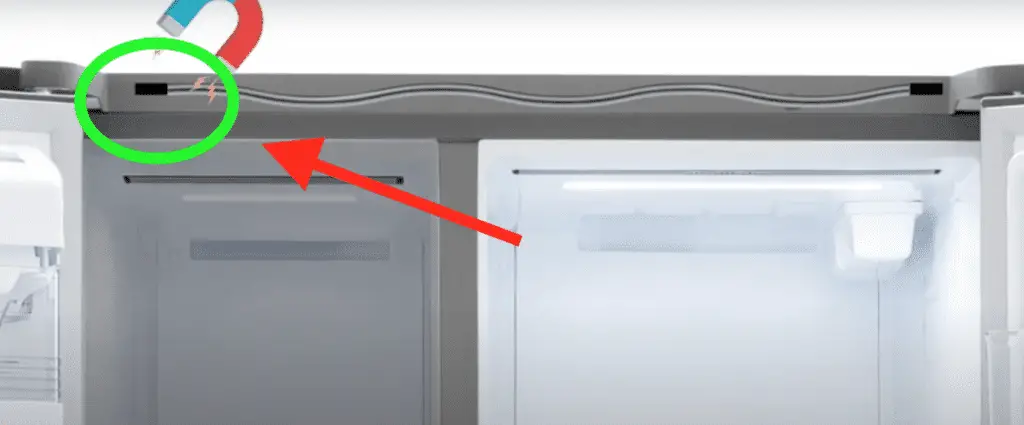
Finally, water won’t dispense from the refrigerator if the fridge thinks one or more of the doors is open. Make sure nothing is blocking the doors from closing, then test the push switch on each door.
When this switch is pushed and held in, the light on that side of the refrigerator should turn off. If it doesn’t, this may indicate a loose connection underneath the top door hinge.
NOTE: if there isn’t a push switch on the door, it’s likely magnetic. You can still activate it by holding a magnet over that section of the door frame.
Check water pressure and change water filter
Now that we know the water is on, we need to confirm that the water pressure is sufficient.
Water pressure is critical when it comes to making ice! We’re looking for between 20-120 PSI without a water filter, and 40-120 PSI with a water filter installed.
Instead of hiring a plumber or technician, you can go to Home Depot or Lowe’s and purchase an affordable pressure gauge.
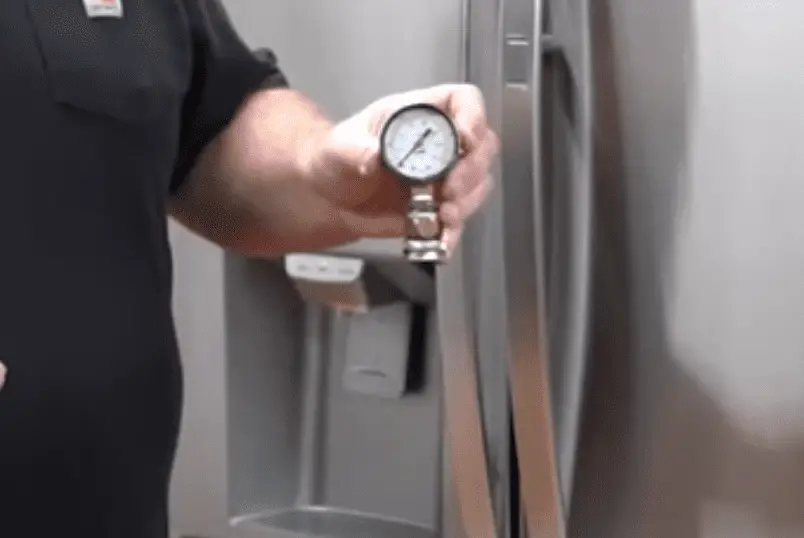
Simply connect this gauge to an outdoor water spigot, and see what kind of pressure (PSI) your home is getting!
Keep in mind that water filters can have a big impact on the water pressure your ice maker is receiving. That’s because Kenmore manufactures their water filters to precisely control the feed rate of water into the ice maker.
During the ice making process, the ice maker water valve is only opened for a moment, just long enough to fill the ice tray. If the water pressure is off, even by a little bit, you could experience problems.
If your water filter is older than 6 months, consider replacing it. Over time, minerals from the water supply can build up inside the filter and partially, or fully clog it.
I also suggest you avoid any after market water filters. After market filters are unlikely to have the correct specs, and may impact your Kenmore refrigerator’s ability to create ice.
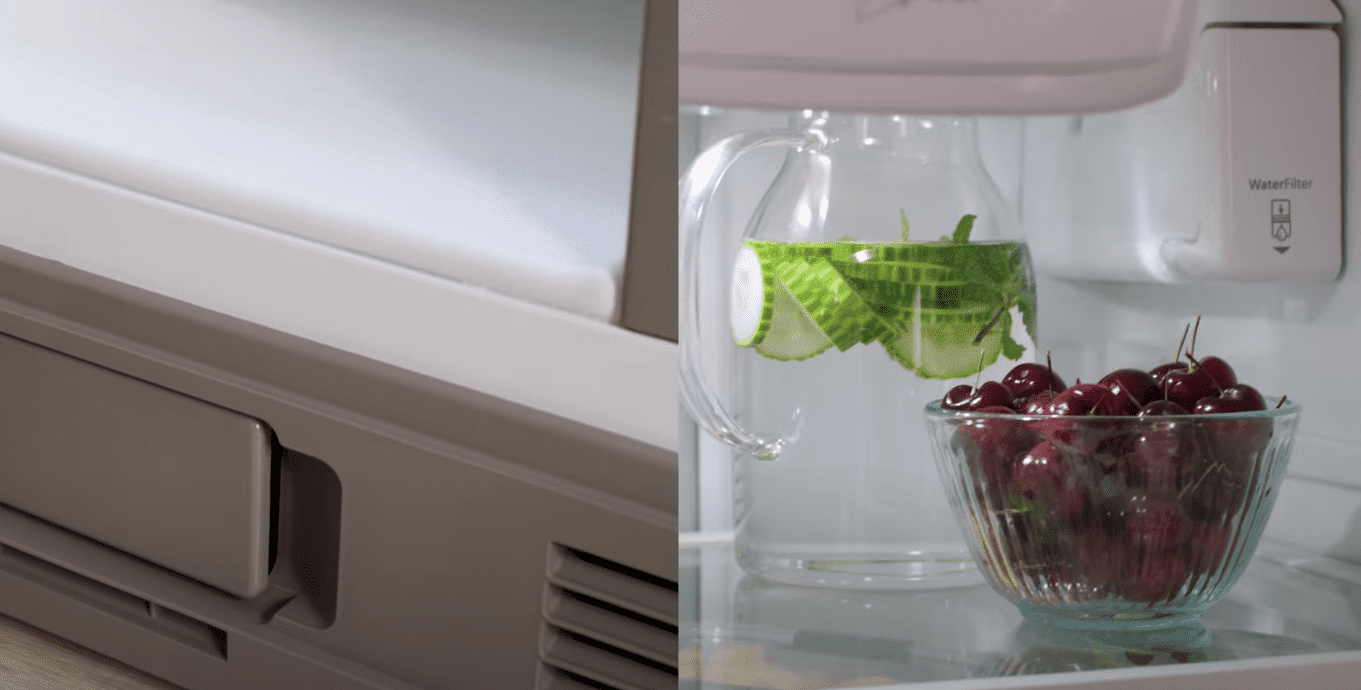
Your Kenmore water filter location will vary depending on the model refrigerator you own.
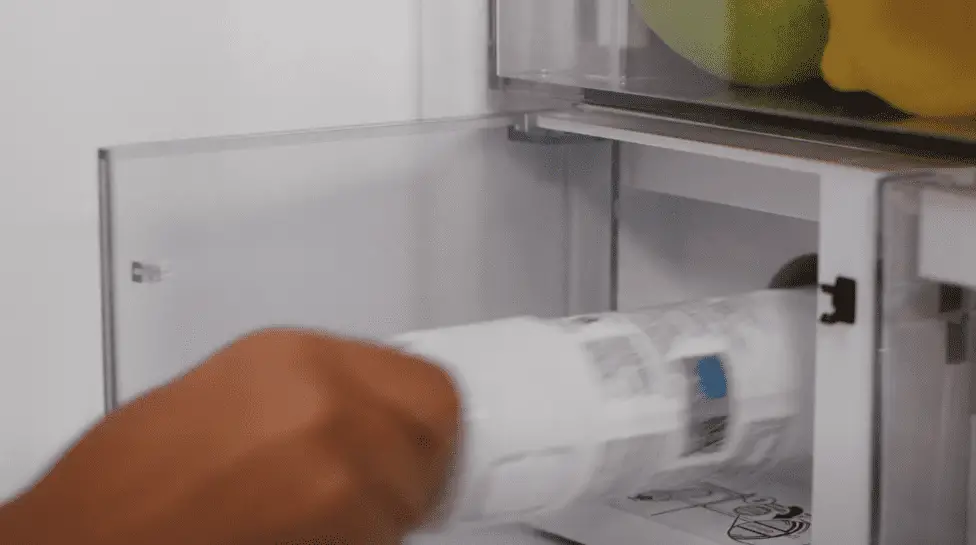
If you do end up replacing the water filter, make sure you purge any excess air built up in the lines by filling up a few cups of water from the refrigerator door.
Finally, in rare cases, the water inlet valve/pump from the back, bottom of your Kenmore refrigerator can fail. If it does, you may get low water pressure, or no water at all.
Defrost ice maker fill tube
Speaking of water pressure, it’s possible the water flow to your ice maker is low, or fully blocked due to a frozen fill tube.
The “fill tube” is just the tube that fills up the ice tray with water.
You’ll want to find where the water enters your ice maker (location will vary depending on model) and ensure that this fill tube is not frozen or obstructed in any way.

If it is frozen, try using a hair dryer to thaw it out. Be careful not to get the tube or any other component of the ice maker too hot as it may melt/deform it.
Refrigerator isn’t getting cold enough
It’s also possible that your Kenmore refrigerator simply isn’t getting cool enough.
There are a number of steps you can take if your refrigerator is not getting cold enough to produce ice:
- Confirm that the power outlet is working
- Unplug refrigerator for 2 minutes before plugging back
- Lower the temperature setting
- Check that the refrigerator and freezer doors are closing fully
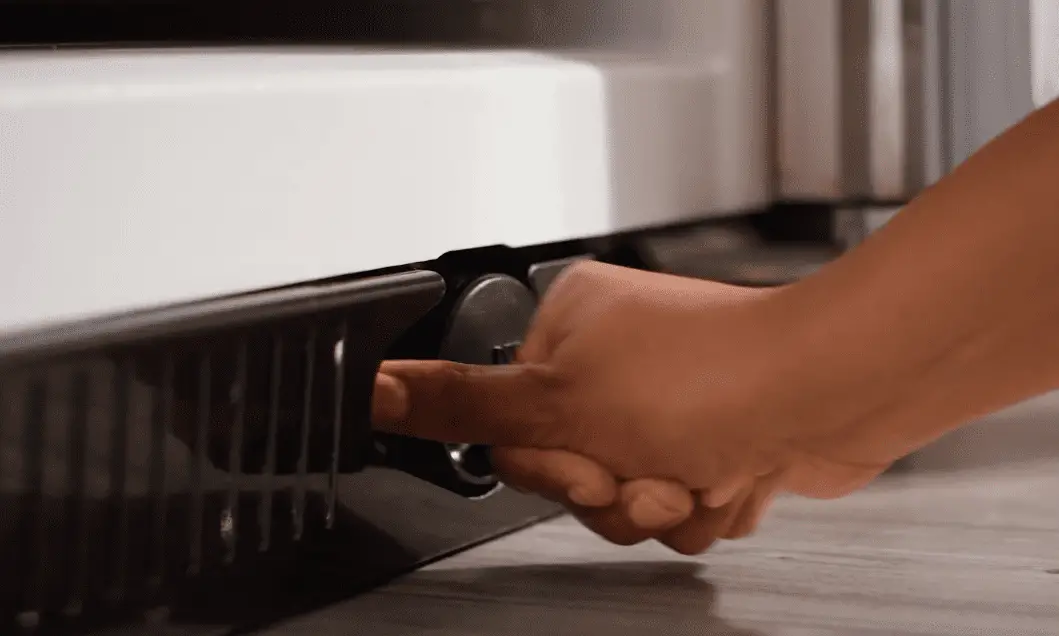
- Clean off the condenser vent and coils
- Make sure the condenser fan is working
- Check if the compressor relay failed
- Confirm that the defrost heater is working
- Make sure the defrost thermostat is working
- Check if the evaporator fan is working
- Unclog the defrost drain
You can click the link just above this list for a more detailed break down of each step.
How to order Kenmore refrigerator replacement parts
Hopefully you were able to discover exactly what’s causing your Kenmore ice maker not to work.
If you found a bad or defective part, you’ll need to replace it.
Start by opening up your refrigerator door and looking on the side wall. You should see a sticker with all the details regarding your appliance.
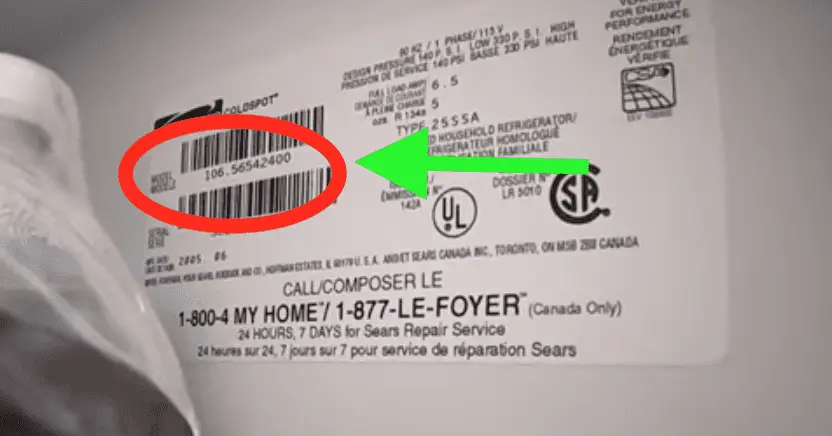
You’ll want to take down the exact model number of your refrigerator.
Finally, type that model number into Sears Parts Direct and locate the exact part you need.
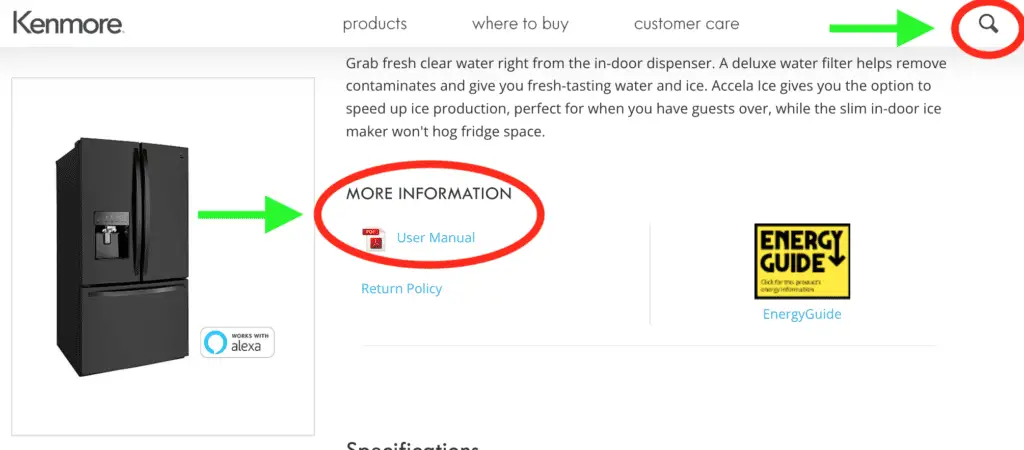
Kenmore refrigerator user manual
Not that you have your Kenmore refrigerator model number, you can type it into the search bar of Kenmore.com and pull up the user manual.
Scroll down until you find “User Manual“, under “More Information“.
The user manual will likely have some additional, model specific troubleshooting steps you can try in addition to what I’ve described here.
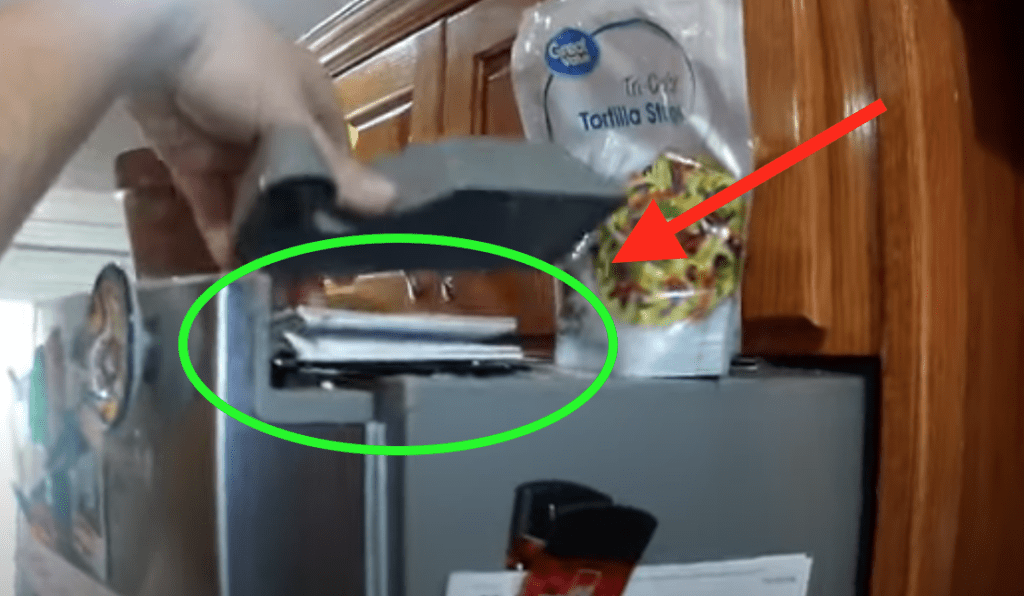
NOTE: many Kenmore refrigerators also have a physical copy of the user manual on the top right hand side of the refrigerator. If you simply take off the door hinge cover, a manual will be underneath!
Kenmore support
If your Kenmore ice maker is still not working, you’ll likely need to replace the entire ice making unit.
Unfortunately, these types of fixes typically require a trained professional. I’d start by contacting Kenmore support.
You can reach them at 1-844-553-6667.
You can also schedule time online for a certified service technician to come directly to you. In some cases, your warranty will cover the entire repair cost!
Conclusion
When your Kenmore ice maker is not working, there are several proven ways to fix it:
- Confirm ice maker is ON
- Set refrigerator temperature to 37°F and the freezer to -0°F
- Turn ice maker OFF and then back ON again
- Check refrigerator door wiring
- Press ice maker reset button for 3 seconds
- Clear out compacted ice from ice bin
- Unblock bail arm, paddle arm or IR sensors
- Make sure water is ON and pressure is between 40-120 PSI
- Replace water filter if it is more than 6 months old
- Defrost ice maker fill tube
- Investigate why your appliance isn’t getting cold enough
If you discover a faulty part, simply order a replacement.
If none of these fixes work, your best bet is to hire a certified technician to come and take a look.